
What this changes on your cluster
A KubeVirtVirtualMachine in your project namespace, a PVC cloned from the library’s golden image, and a Secret holding the cloud-init user data — owned by the VM, so deleting the VM reaps it.
Nothing outside the namespace changes, with one exception worth knowing: asking for an identity address claims an IP from the supervisor’s VM-identity pool, which is shared estate.
Before you start
- The Virtualization step, from onboarding — KubeVirt and CDI.
- A project namespace. Leave the namespace empty and the VM lands in
default, which is not a tenant boundary and not what you want. - An image in the library with
status: ready. A cloning image is not usable yet, and the create call refuses it by name. - Permissions:
vm:Create, scopedsupervisor:<name>:vm:*.
The shape of it
Pick an image → size it → choose the network → say what runs at first boot → create. The network choice is the one that is expensive to change afterwards.Step 1 — Pick an image
Three fields on a library image decide whether it is the one you want:- Dashboard
- API
- MCP
Workloads → New workload → Virtual machine. The image picker lists the VM library.
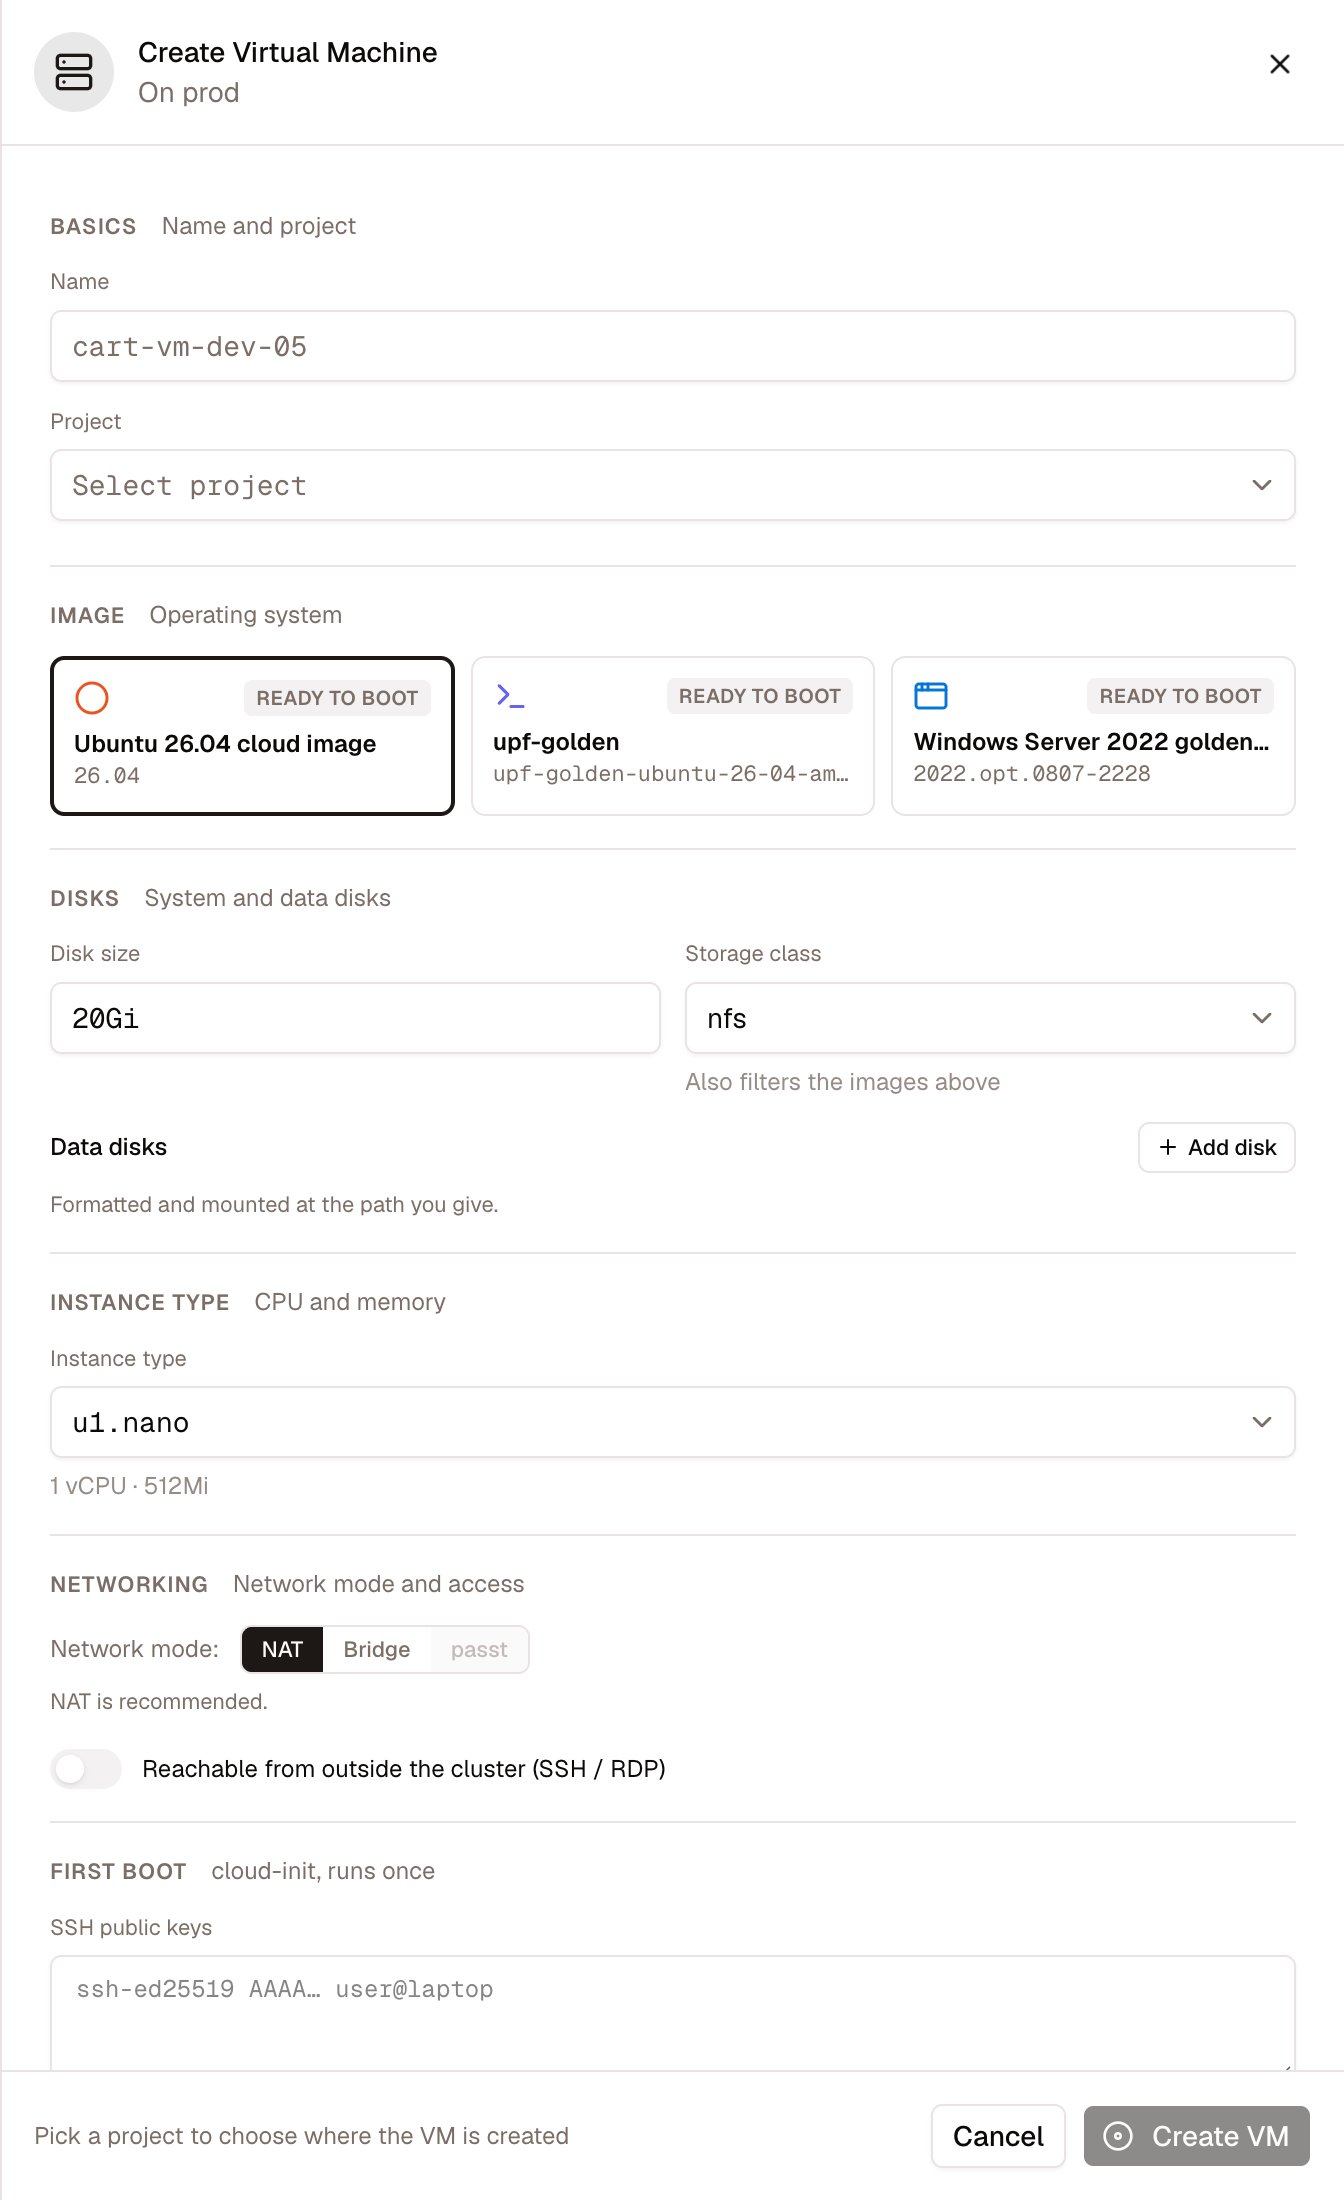
Create Virtual Machine: image, disks, instance type, network mode and first boot on one form
Step 2 — Size it
instanceType and diskSize are the two you set; storageClass falls back to the supervisor’s default when empty.
Instance types come in families, and the family prefix tells you what it promises:
Every family promising dedicated CPUs —
cx, n, rt, d — only schedules on nodes whose CPU manager is enabled. If a VM on one of those sits Pending with nothing else wrong, that is the first thing to check; u and o have no such requirement.diskSize defaults to 20Gi when omitted.
Step 3 — Choose the network model
Three modes, and the difference between them is not a preference — it decides whether the VM can ever move.bridge drops the eviction strategy, deliberately: an eviction strategy on a VM that cannot migrate would wedge a node drain. So choosing bridge is choosing a VM that pins to its node, and the cost surfaces at maintenance time rather than at create time.
An identity address — identityNetwork: true plus an identityPool — gives the VM a routable /32 that follows it through live migration, with no LoadBalancer involved. The claim is allocated before the VM object is created, so a bad pool, an exhausted one, or a non-migratable image fails cleanly with nothing half-made.
Combining identity with bridge or passt is allowed but logged as experimental: the claim’s NAT chain was built for the masquerade network layout and is untested against the other two.
Step 4 — Say what runs at first boot
Cloud-init is injected as KubeVirtcloudInitNoCloud. You can pass sshKeys, a password, startupCommands, or a cloudInitTemplateId with cloudInitVariables — a stored template rendered and prepended to the startup commands. Render it first if you are unsure; the preview is a separate call precisely so a broken template fails before a VM exists.
installGuestAgent defaults to true on Linux, and it is worth leaving on: guest IP and OS reporting, graceful shutdown, snapshots, and the process and listening-port views all depend on it. Windows goldens get Hyper-V enlightenments and WinRM automatically.
rootPartitions carve extra partitions on the boot disk; dataDisks attach, format and mount additional blank disks.
Step 5 — Create it
- Dashboard
- API
- MCP
Workloads → New workload → Virtual machine, then Create VM.
Result:
201 {"status": "created"}. That means the objects were applied — not that the VM is running. Provisioning continues in the background.
Verify
The VM reaches Running. Poll it rather than assuming; the 201 was an apply. The identity address is stamped. It is written at create time, but not necessarily visible on the first read — Celum’s own suite waits foridentityIP to appear before wiring a second VM to it. Read it back rather than computing it.
The guest agent is reporting. Guest IP, OS and process views only populate once it is up, and its absence is the usual explanation for a VM that looks half-blank in the console.
- API
- MCP
GET /api/supervisors/{name}/vms for status; the VM detail page for identityIP, identityPool and identityStale.If you need to undo it
Deleting the VM removes it and reaps its cloud-init Secret through the owner reference. There is no MCP tool for deleting a VM, and that is policy rather than an oversight: no tool in the catalog destroys data. Deleting requires a person, in the dashboard or over the API withvm:Delete.
Volumes are separate and deliberate: detaching a disk is not deleting it, and the two are different permissions (vm:Eject covers both detach and delete-volume). Check which one you are pressing.
What commonly goes wrong
Next
VM lifecycle
Start, stop, resize, live-migrate, snapshot, clone and move between projects.
VM networking
Publishing a VM port through a LoadBalancer or a Gateway.
VM storage & disks
Attaching and mounting volumes — and which operations destroy data.
VM identity pools
The pools the claim addresses come from.
Migrate VMs from vSphere
Bring existing VMs in from vCenter instead of building them anew.